Creating cinematic videos is not just about camera quality — it’s about storytelling through color, movement, and emotion.
In this post, I’m sharing my complete process on how I edit cinematic videos from raw footage to final masterpiece.
🎥 1. Organizing My Footage
The first step in every project is organization.
I create folders for footage, music, LUTs, and sound effects.
Proper organization saves time and keeps the workflow clean.
🧠 Tip: Rename your clips before importing into Premiere Pro (e.g., “Scene1_SlowMotion”).
This helps when you edit long sequences.
🧩 2. Selecting the Best Shots
After importing, I start with rough cut editing — picking only the best shots that fit the story.
I remove unnecessary clips and keep transitions natural.
🧠 Tip: Focus on emotional moments and movement. Cinematic edits flow like a story, not like a slideshow.
🎞️ 3. Adding Smooth Transitions
Cinematic videos feel professional because of seamless transitions.
I mostly use:
- Cross dissolve
- Luma fade
- Mask reveal
- Motion blur transitions
🧠 Tip: Don’t overuse transitions — keep them subtle and story-driven.
🎵 4. Music and Sound Design
Sound adds emotion to visuals. I choose cinematic background scores from platforms like Epidemic Sound or Artlist.
Then I add whoosh, hits, risers, and ambient sound layers to create depth.
🧠 Tip: Sync your video cuts with the music beats. It gives a rhythmic, professional flow.
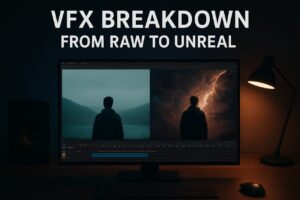
🎨 5. Color Grading & LUTs
Now comes the magic part — Color Grading!
I use Lumetri Color in Premiere Pro or DaVinci Resolve for detailed grading.
My signature cinematic look is inspired by teal-orange contrast with soft highlights.
🧠 Tip: First do basic correction (exposure, white balance) → then apply LUT → then adjust shadows, highlights, and skin tones manually.
✨ 6. Final Polish & Export Settings
Before exporting, I check everything frame by frame — transitions, brightness, sound levels, and sharpness.
🧠 My Export Settings:
- Format: H.264
- Resolution: 1920×1080 (or 4K if needed)
- Bitrate: 15–20 Mbps
- Audio: 320 kbps
Finally, I apply my Yash Edits Signature LUT for that cinematic glow and upload it for the world to see 🌍
💬 Conclusion
Cinematic editing is not about copying someone’s style — it’s about creating your own mood and visual identity.
Start simple, practice daily, and learn to feel your footage.
With every project, you’ll get one step closer to your own cinematic magic.
👉 Follow Yash Edits for more tutorials, transformations, and professional editing breakdowns.